Blocklists
Blocklists are collections of domains and/or servers that are suspected of collecting analytics, serving ads, and more. Instead of having to find out by yourself which domains or servers are being used for such suspicious activities, you can benefit from the expertise of others who have already created blocklists. Most blocklists are dedicated to specific topics, such as preventing access to ad servers, or improving privacy by blocking access to servers that collect user statistics or other metrics.
The first time you switch to the blocklists section, Little Snitch Mini invites you to add blocklists or create your own custom blocklist from scratch:
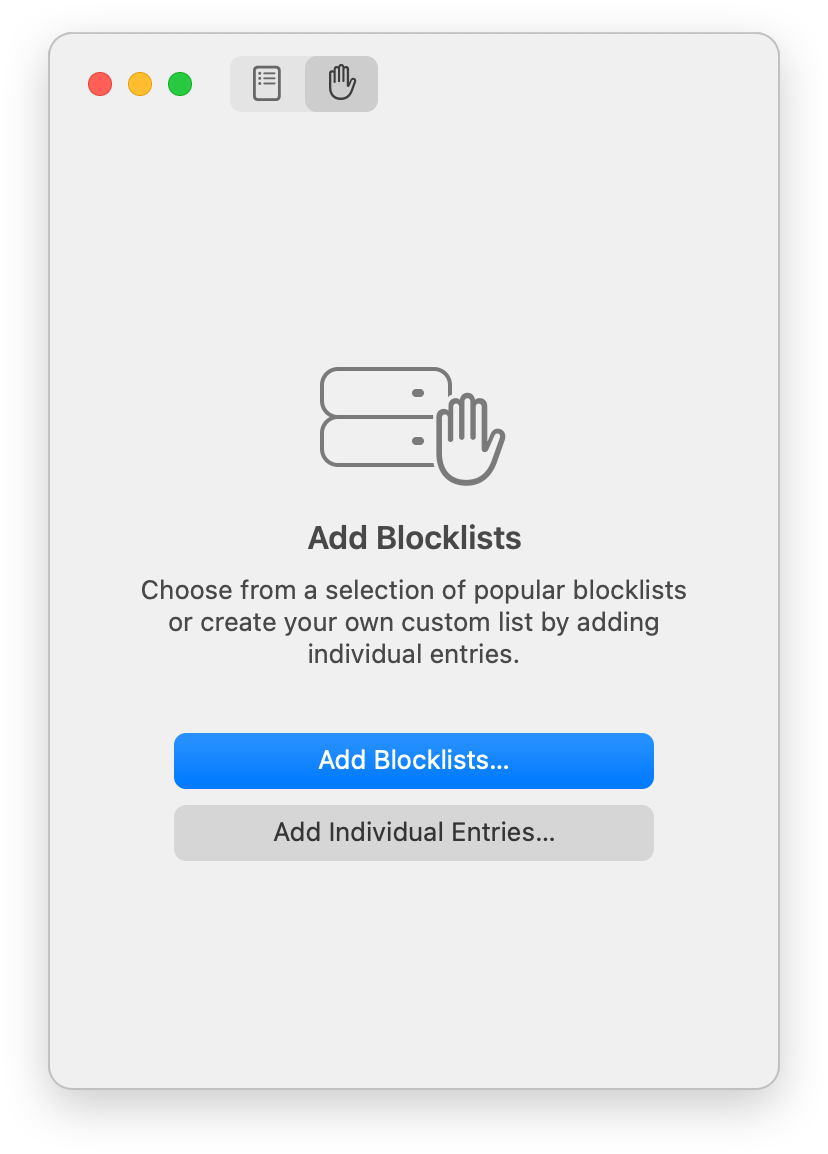
Click “Add Blocklists…” to choose from a selection of blocklists or “Add Individual Entries…” to enter domain names you wish to block and create your custom blocklist.
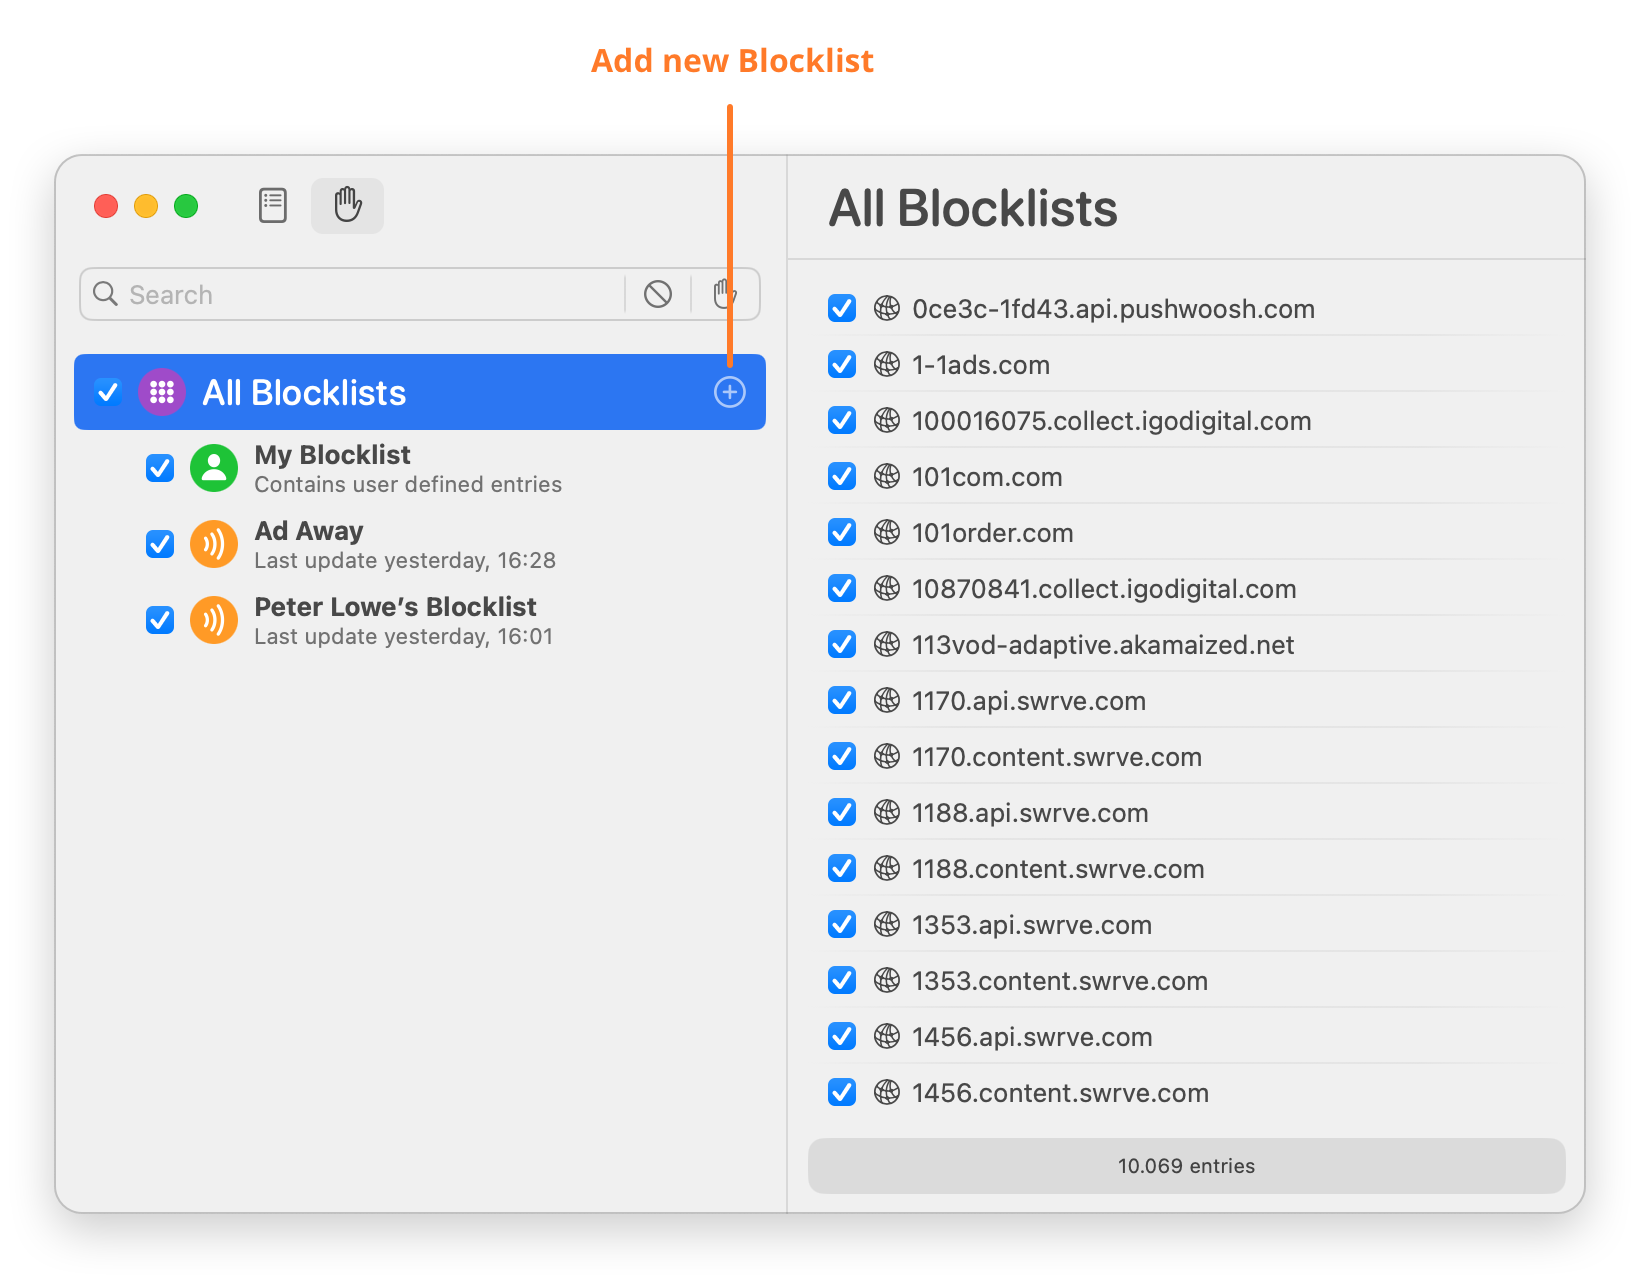
Once you have already added blocklists, you can add even more by clicking the “+” to the right of the “All Blocklists” entry:
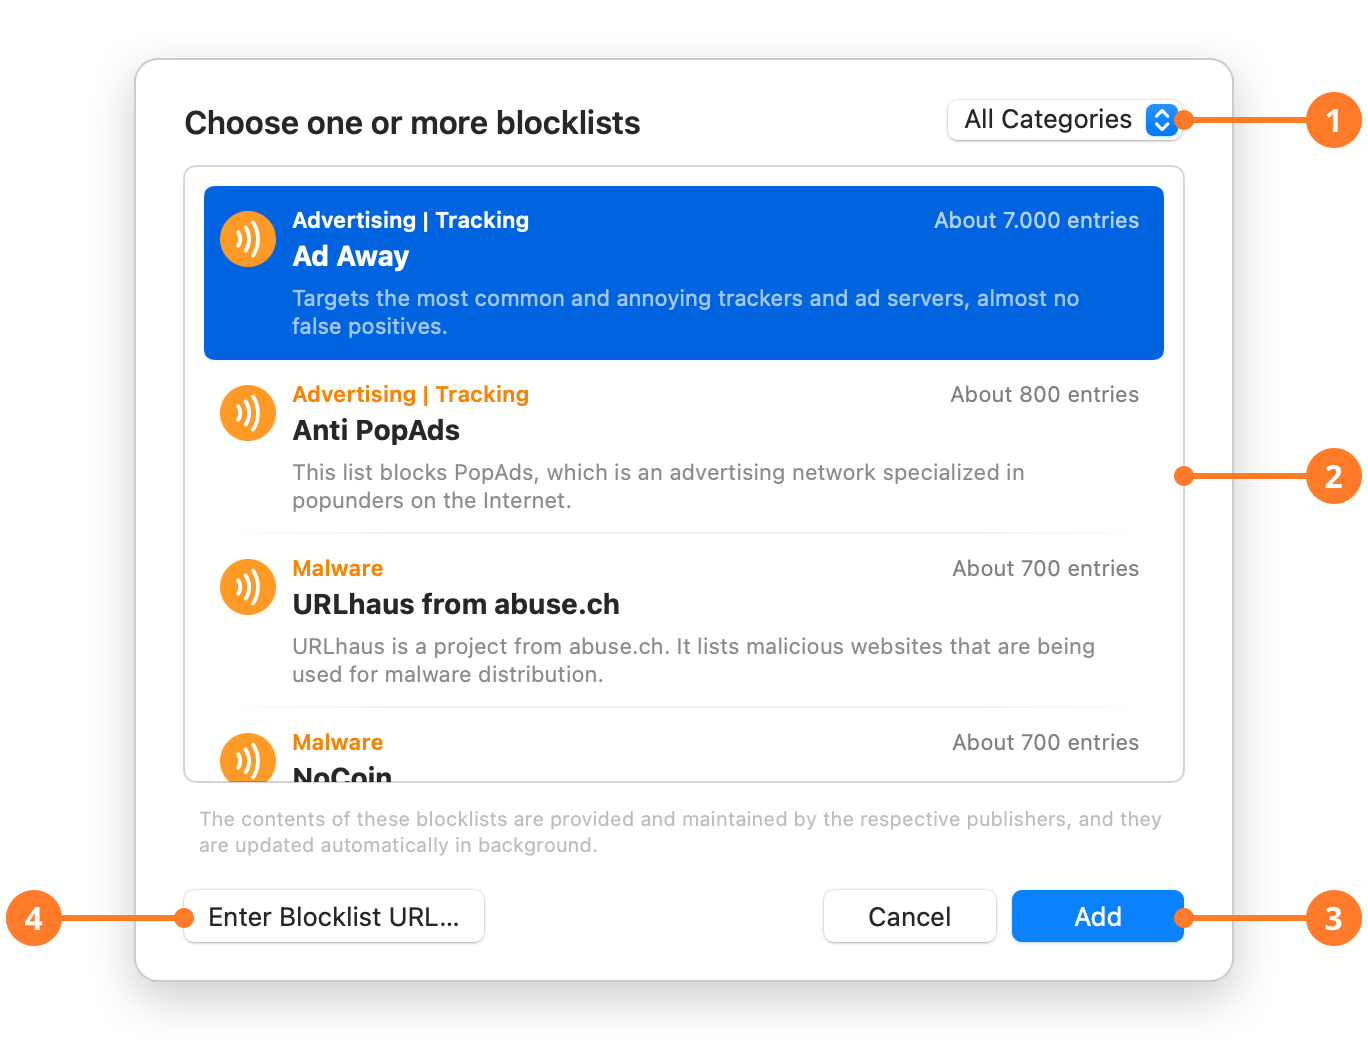
In the next dialog, you can choose from several blocklists that we have found to be useful:
| ITEM | DESCRIPTION |
|---|---|
| 1 | Click here to filter the displayed blocklists by category. Some blocklists specialize in tracking, others in malware, and still others in explicit content. Some blocklists even combine several topics. |
| 2 | Lists all blocklists for the selected category. The orange text above the title tells you in what categories the list specializes in. Below the title, there is a short description, and to the right of each entry is an estimate of the number of domains or servers included in the list. |
| 3 | Select the blocklist you want to add and click “Add” to use it. |
| 4 | If your favorite blocklist is not contained in our list, you can add it manually by providing its URL. Little Snitch Mini accepts blocklists in various formats: as /etc/hosts file, as a simple listing of domain names or as Little Snitch Rules (.lsrules) file. |
Working with Blocklists
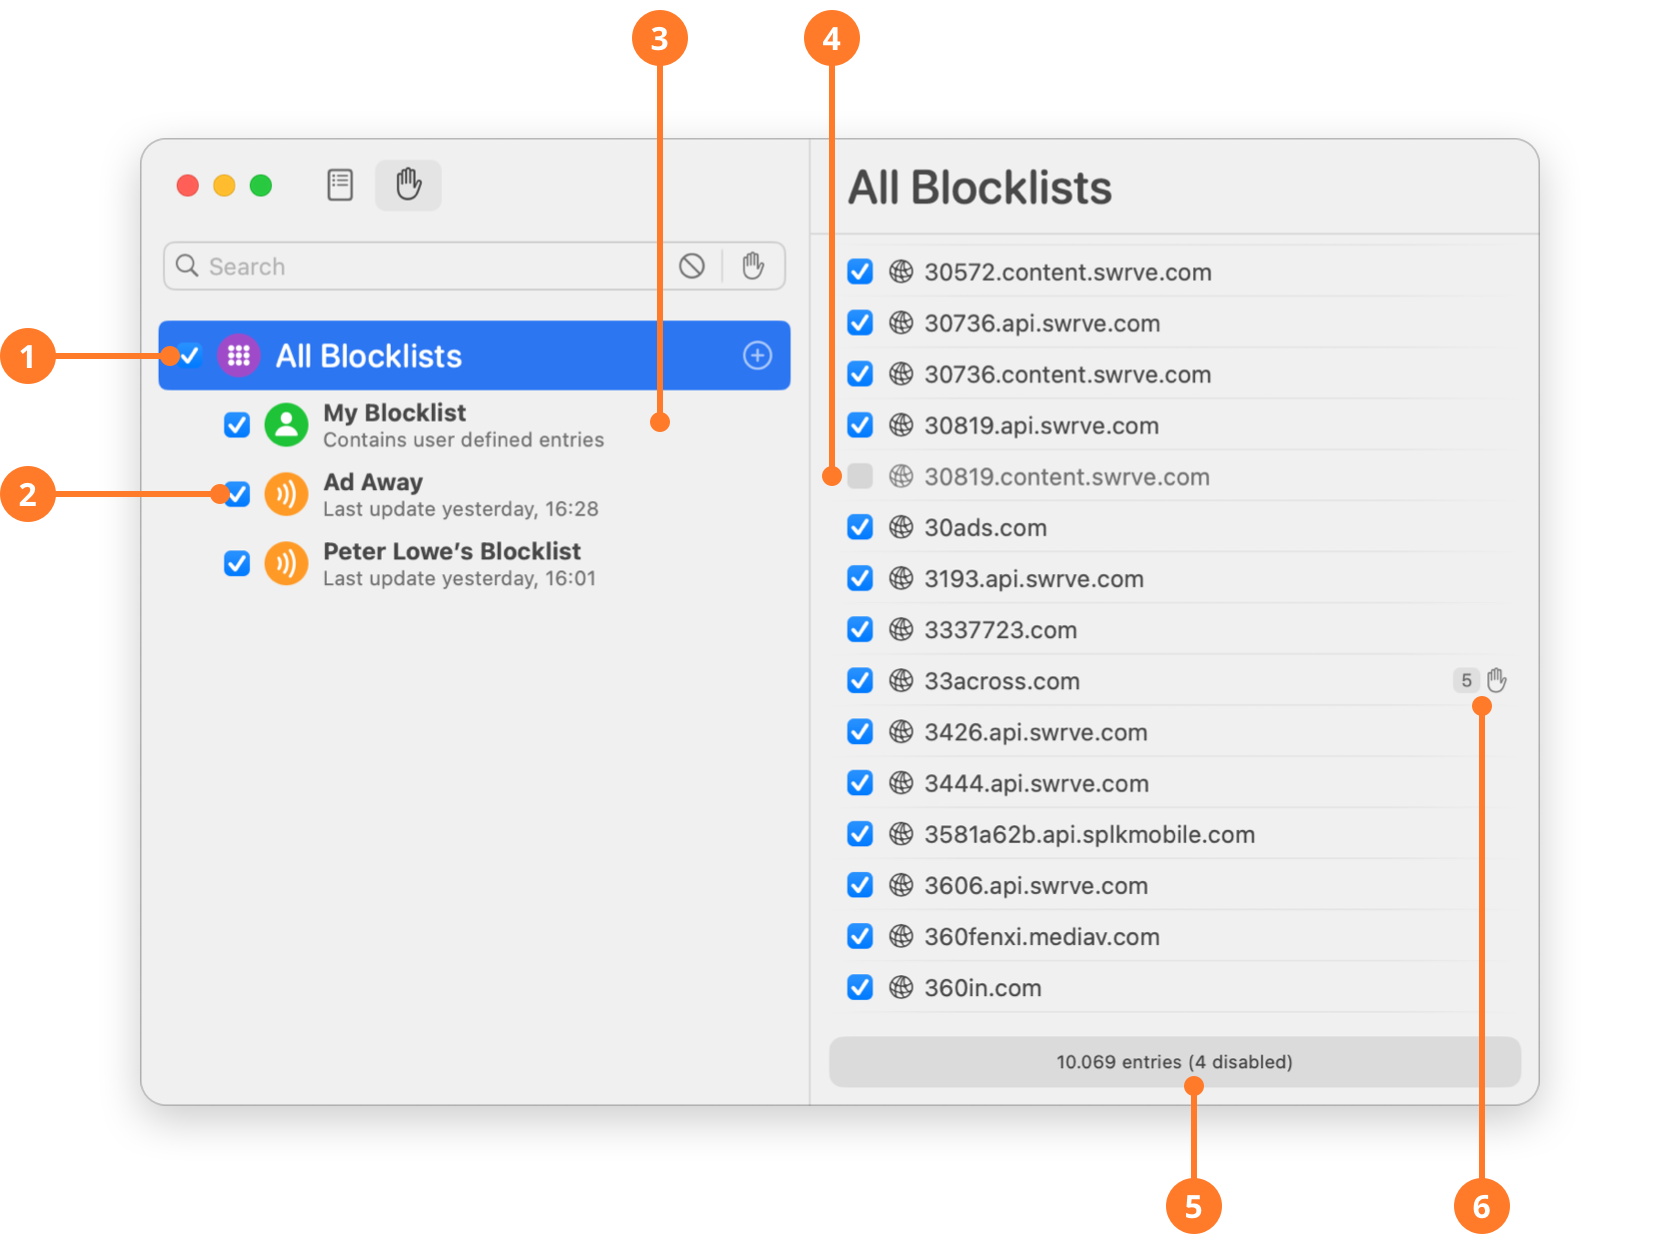
The blocklists section consists of two lists: The list on the left shows all the blocklists you have added, while the list on the right shows all the domains and servers included in the selected blocklists.
| ITEM | DESCRIPTION |
|---|---|
| 1 | The “All Blocklists” entry summarizes all the domains and servers from all blocklists including “My Blocklist”. The checkbox on the left allows you to enable or disable all blocklists with a single click. |
| 2 | Click here to enable or disable blocklists individually. |
| 3 | “My Blocklist” contains all entries you have added manually. |
| 4 | Similar to entire blocklists, individual domain or server entries can be disabled as well. Note, however, that if an entry is included in more than one blocklist, the enabled state is set in all those blocklists. |
| 5 | The bottom section shows how many domains and servers are contained in the selected blocklist and how many of them are disabled. |
| 6 | Little Snitch Mini tells you how often a particular blocklist entry was used. |
Filtering Blocklists
When you want to know whether a particular domain is contained in a blocklist or how effective particular blocklist entries are, the search bar is your friend:
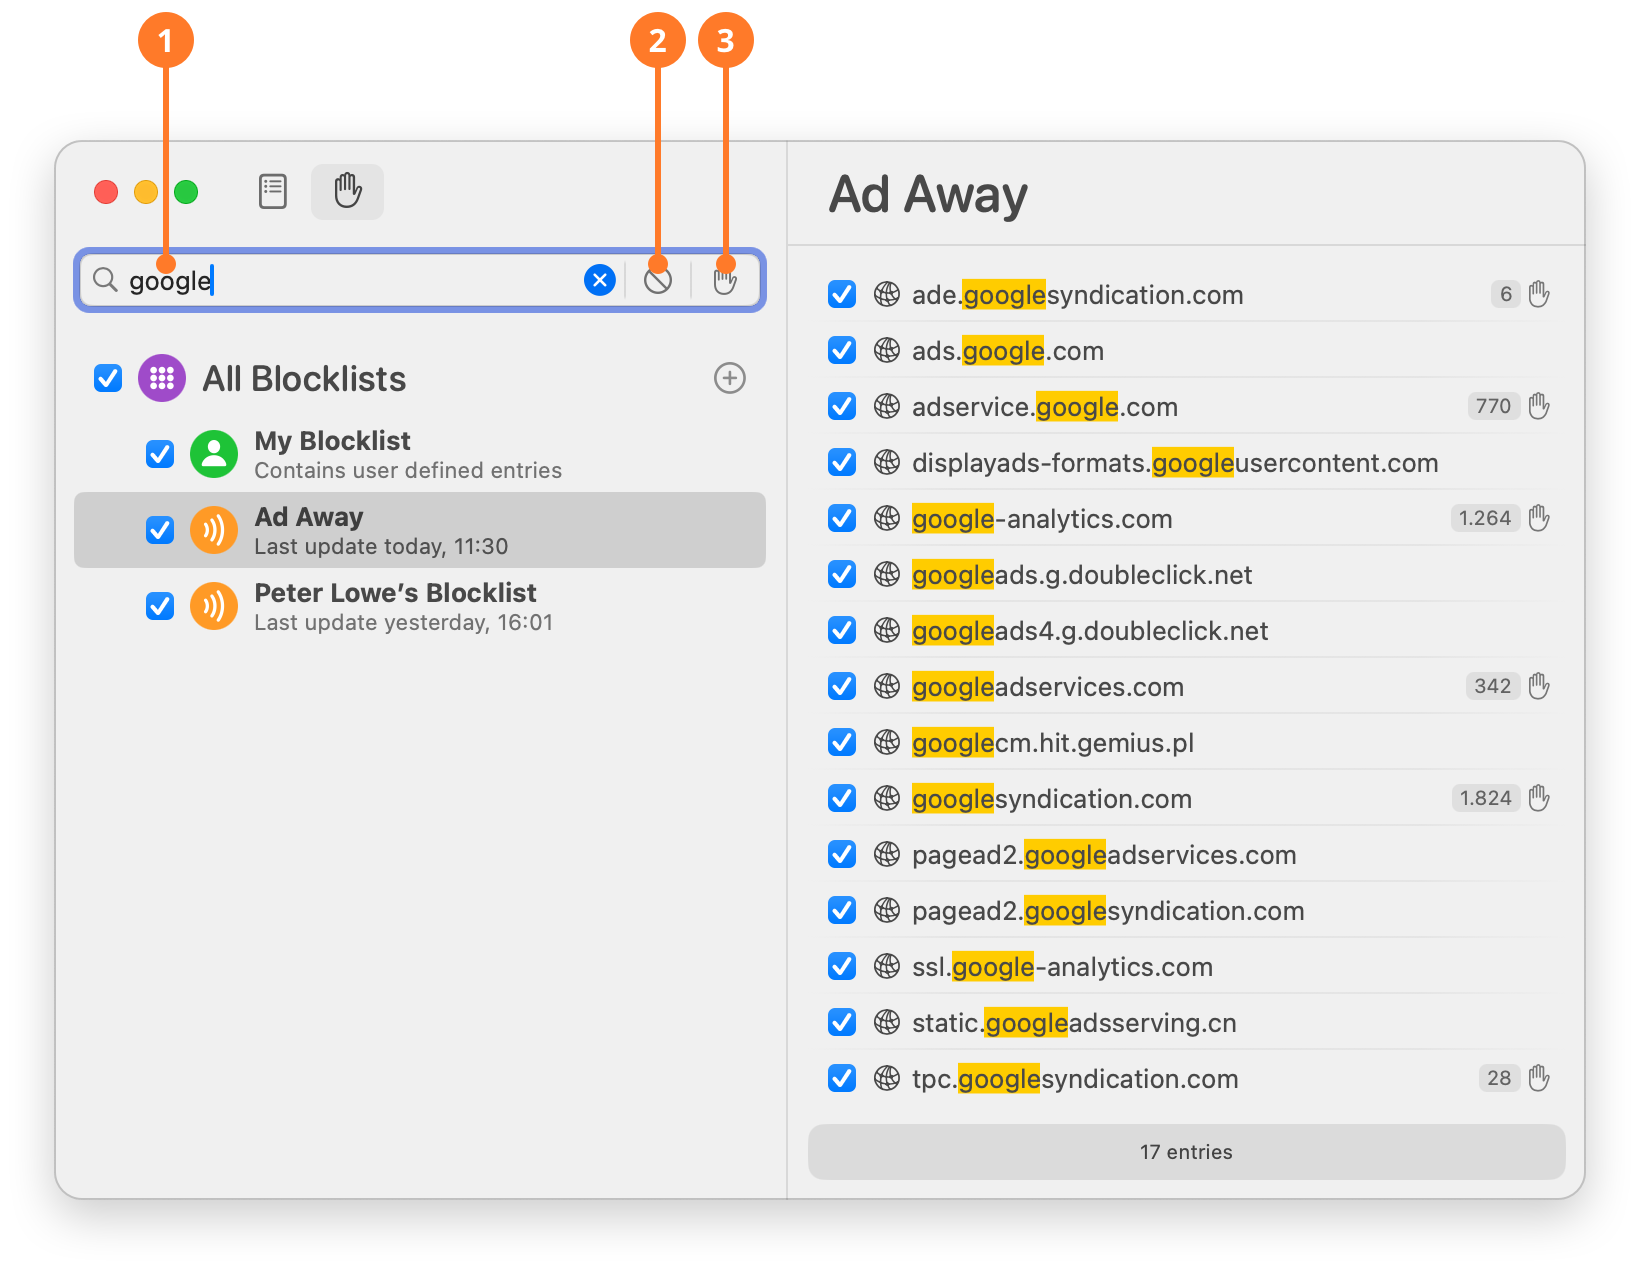
| ITEM | DESCRIPTION |
|---|---|
| 1 | Enter text here to search in the selected blocklist. E.g. enter “google” to see how many tracking or ad services from Google have been identified by the maintainers of your blocklists. |
| 2 |  Click here to show only disabled entries. Click here to show only disabled entries. |
| 3 |  Click here to show only entries that have already been used to block a connection. When this filter is active, blocklist entries are automatically sorted by usage count, so that the most frequently used entries appear at the top. Click here to show only entries that have already been used to block a connection. When this filter is active, blocklist entries are automatically sorted by usage count, so that the most frequently used entries appear at the top. |
When evaluating the value of a blocklist, don't rely solely on usage numbers. A blocklist that protects you from malware will hopefully never be used, but is still very valuable. You may want to read our blog article on the topic.
Was this help page useful? Send feedback.
© 2016-2026 by Objective Development Software GmbH